Friday, December 4, 2015

SmartMusic crash on Launch Caused by Bad EPSON audio kext

I received a ticket for SmartMusic crashing on launch from a teacher at one of our schools. This issue did not occur in much older versions of the software. Only in software after the late 2014 releases. Because my troubleshooting did not reveal anything in particular or resolve the issue I opened a ticket with makemusic.

I sent them the crash logs and system information report from the computer in question and they came back with this info:

"If you look at the audio section of System profile you've send me, it will tell you "There was an error while gathering this information." This will commonly cause newer versions of SmartMusic to crash on Mac."

After some experimentation today I discovered that the problem was caused by the "EPSON Projector Audio" kernel extension installed via EasyMP Network Projection that we use with our wireless projectors. System Information shows the same error on all machines I've tested with the software installed.

Unfortunately the uninstallation tool provided with the software does not remove the kext. In El Capitan the offender can simply be removed from /Library/Extensions, in earlier versions of OS X the kext can be found in both /Library/Extensions and /System/Library/Extensions.

The wireless projector software still functions without the sound kext, it is only required for utilizing the speaker in the projector itself.

Once the kext was removed and the computer was rebooted not only did the audio information populate correctly in System Information but the SmartMusic ran properly.

Tuesday, November 24, 2015

Configuring an OS X Guest for a Vagrant base box

In the guest OS we need to complete four tasks in order for vagrant to be able to do the things it expects to be able to do. In simple terms we need to do the following:

  1. create a user vagrant with password vagrant
  2. install VMware Tools
  3. enable and configure ssh
  4. configure sudo

1. create a user vagrant with password vagrant

To meet the first requirement we can simply go through Setup Assistant in the guest OS X instance specifying the account name vagrant and the password vagrant.


2. install VMware tools

Once we have a usable machine the next thing we should do is install the VMware Tools. This allows the vagrant project folder to be mounted in the guest at /vagrant. To do this VMware will mount a disc inside the virtual machine that contains the VMware tools installer.
  • In the host OS select the Virtual Machine menu in VMware Fusion
  • Select Install VMware Tools
  • Fusion will present a warning sheet informing you that it will mount a fake disc in order to complete the installation. Simply click Install
  • In the guest OS double click on the Install VMware Tools package and restart the VM when prompted. (doing this in Catalina may require approving, restarting, and installing again)


3. To enable and configure ssh we need to do the following:

  • enable ssh aka Remote Login in System Preferences' Sharing pane

  • Vagrant boxes typically allow login via publicly available keys. This can be changed, if required, for security reasons but that is beyond the scope of this document. Also, when `vagrant up` detects that the public key is in use it automatically creates a new key and injects it into the machine increasing the security somewhat. To enable login via key we need to create a hidden folder and obtain the public key from github.
  • The Vagrant docs suggest that we disable DNS lookups to increase ssh performance for VMs that may not have a connection to the internet.
    • still within Terminal open sshd_config in your editor of choice (EDIT: since written this post has incorrectly stated that you should edit ssh_config but that is incorrect)
      • sudo vim /etc/ssh/sshd_config
    • uncomment the existing line for this entry and save the file
      • UseDNS no


4. configure sudo

The last thing we need to configure in the VM is sudo. Vagrant uses sudo to perform tasks in the guest OS that require elevated privileges. The docs also suggest setting the root password to vagrant but this is not required, especially in OS X where root availability is not an expectation. Configuring sudo properly is very important to prevent errors later.

Use visudo to edit /etc/sudoers

EDIT: key presses removed as they are no longer accurate.
  • add an entry below the %admin group as shown in the screenshot below
The vagrant line should look like this before you :wq


Cleanup

As a final bit of cleanup before shutting down:
  • type the command "history -c" in Terminal and then quit it
    • clearing history in zsh (Catalina+) is a bit more annoying.
      • by default you need to exit the shell, run a new one, and `rm .zsh_history`
        • yes this will still show that rm
  • clear Recent Folders in the Go menu of Finder
  • clear Recent Items in the Apple Menu


In the next post we will pack up the VM into a box and finally start playing with vagrant.

Installing OS X into a VM for a Vagrant base box

To begin creating base boxes everything you need to know is available in the Vagrant documentation here and here. As far as what you need to own, VMware Fusion and the VMware Fusion Provider make things easier for OS X.

This first page will simply show you how to install OS X into a new VMware VM. If you have done this many times please take a quick skim through this page as we are going to make some modifications to ease the creation of our Vagrant box version catalog. I will mark these steps with a bold *.

Follow along with my graphical guide.

1. Create a New VM and select the OS X Installer app.
2. * At this point you will drag in (or select via dialog) an OS X installer app. This is the first step where the end goal matters. I want a catalog of OS X Versions available to me so I can spin up any point release at any time.

Why?

Because it is cool.

Also, for testing.

Because of this I have already copied all the installation app versions of Yosemite onto this computer (except 10.10.5 I already have a base box for that). We will start our journey with 10.10.0.
3. * Now we want to customize our VM. Click Customize Settings
4. * To do this Fusion requires that we save the configuration. The major os version is pre-populated as the VM name. We want to add (at the least) the minor version number to make this particular VM easier to find and keep track of later.

5. After a few moments at the following screen you will be presented with a window very similar to System Preferences.

6. * We are concerned with only a few settings here. These are highlighted below.

  • We will change the networking on the VM from NAT to bridged.
  • Adjusting the size of the drive is not required but if you plan to use the VM for testing large installations etc. you may want more than the default of 40GB.
  • Removing the Sound Card, Camera, and USB controller is recommended by the documentation. I believe this is just to reduce Linux complexity and also reflects Vagrant's origins as a developer tool more than anything. The Sound Card and Camera can be removed but Fusion will tell you that OS X requires USB if you try to remove that functionality.

7. * In Network Adapter the circles on the right function as radio buttons and must be clicked to change this setting.

8. Changing the size of the virtual drive will require erasing or resizing the volume once the guest OS is running.


9. We can remove the sound card and the camera even though I don't think it is really necessary for an OS X box, the documentation suggests it.

*shrug*

10. Now that the hardware configuration is complete we can close the settings window and start up the VM.
11. The OS X installation environment is probably very familiar to anyone reading this. If you did change the size of the hard drive in the virtual machine now is a good time to fix the volume size. This can be done by erasing the volume or simply changing the size of the partition. 

HINT: changing the size of the partition is MUCH faster.
  • Select Disk Utility from the OS X Utilities window
  • Highlight the VMware Virtual Machine Drive
  • Select the Partition tab
  • Now grab the lower right corner (red arrow) of the partition graphic and drag it down to expand the partition into the available free space.
  • Click Partition on the warning sheet.
  • Success!
12. Close Disk Utility and begin the Installation of OS X.
13. * Once the installation is underway go back up to the top of this article and start again with the installer app for 10.10.1! I have found that two installations running simultaneously does not hinder things too much.


My next post will detail the changes required inside the guest OS in order for vagrant to do vagranty things. In the meantime create VMs for 10.10.2-10.10.5 if Yosemite is still important for you or create VMs for 10.11.0 and 10.11.1.


Friday, November 20, 2015

On Learning Vagrant

tl;dr I wanted to learn Vagrant so I would know what Packer does and what Tim's templates and Joe's and Rich's scripts are really doing to improve the process of working with many virtual machines. Along the way I learned to make a catalog of OS X versions for Vagrant allowing me to spin up OS X VMs of any version at will and I will show you how to do that too.


This post will begin a series of articles on using 
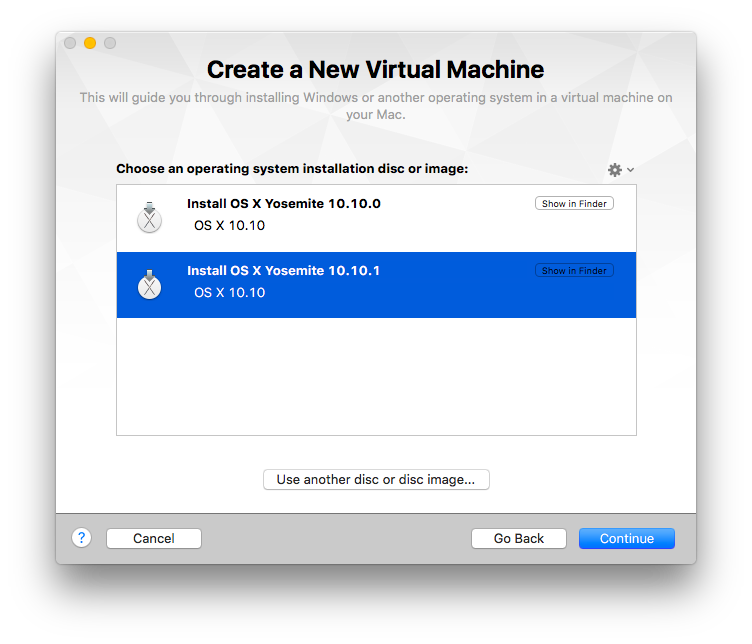
Vagrant to quickly and easily create OS X based virtual machines.

I was first introduced to Vagrant in 2013 by either one (or both!) of Gary Larizza's or Graham Gilbert's posts. I remember thinking it was kinda cool but not really something I needed to put into use (also they were both advocating tools that help with Vagrant but I still didn't know Vagrant). I have access to between 4-8 machines on a daily basis for testing purposes and at the time my portable was a MacBook Air and my iMac still had spinning rust. Not ideal for VMs compared to the i7 with SSD and 16Gigs of RAM I have now.

Fast forward to PSU 2015, both Joseph Chilcote and Rich Trouton are doing presentations on using virtual machines for testing etc. This Vagrantfile Joe showed during the demo that spit out a list of available updates particularly caught my interest because I had gone through the process of updating AutoDMG's UpdateProfiles.plist for new items in the past.

Once I arrived back home I briefly played with vfuse and several other scripts etc. for speedily creating VMs. I didn't really understand what was happening with Packer, Tim's templates or any of that but I managed to find a fix a few problems I was having with some quick Google searches. Somewhat frustrated I put Vagrant away. I was still using the low powered Air and I had to get ready for the start of school. "This won't help me do anything now."

IT work in a school district, in my experience, is pretty cyclical in nature. There are some rough spots at the start and end of the school year and there is a bit of a slowdown in winter. This slowdown is great for research, development, planning, and experimentation. This year I've been feeling things wind down for two weeks or so, and finally at the end of last week I started putting a plan together.

Ultimately I want to get several things going here; Imagr, BSDPy, osquery with logging, and some tweaks to munki and munki-enroll. I knew that one way to get these things going more quickly was Docker and I also knew that a quick way to learn Docker would be to spin up Linux VMs. This is where Vagrant comes back into the picture.

The Vagrant documentation is pretty amazing and I tore into it. I studied it and took notes (physical ones, with a pen). I created some Linux boxes from scratch and I played around. I wanted to create some OS X base boxes for myself as well. I googled and found nothing on creating an OS X base box from scratch (until clicking links further down the results page while creating this post :/ ). I wanted to create some base boxes by hand in Vagrant before learning how Packer improves that process, before learning what Tim's templates do for me so, ultimately, I would know why vfuse + AutoDMG makes that even better.

On the way I learned something pretty cool. Namely that you can create your own catalog of Vagrant base boxes allowing you to spin up, in moments, OS X virtual machines for any OS version you have an installer app for.

The next few posts will show you how to do that too.

Wednesday, July 29, 2015

Making Shared Configuration Profiles Unique

Several people in the community have, from time to time, shared Configuration Profiles via Dropbox links, forum posts, or github. Nick McSpadden has graciously shared a fairly large collection.

There are a few problems one is faced with after copying so many profiles from someone else this way.
  1. The top-level PayloadIdentifier is not ours
  2. The PayloadUUIDs are no longer unique
The first problem is easily solved with existing tools.

sed -i '' 's/org\.sacredsf/org\.glenbrook225/' ./*.mobileconfig

The second problem…not so much.

I wrote a little something to create new UUIDs for the configs.

It works but it needs two things that I can think of.
  1. the nested PayloadIdentifiers should update. I'm thinking something like Apple does but without the text. Maybe formatted like so: "new-top-UUID.new-payload-UUID"
  2. sometimes the outer-level moves from the top of the file to the bottom. I don't know if this is because dictionaries in python have no order or some other reason but it makes them less human-readable.

Friday, January 23, 2015

Voice Updates repo_sync Stats

After Tim Sutton hopped into ##osx-server and freaked everyone out yesterday afternoon I decided to gather some before and after info.

Before:


df -H
Filesystem                 Size  Used Avail Use% Mounted on
/dev/mapper/vgpool-lv_var  476G  239G  215G  53% /var

After repo_sync run (deprecated pkgs NOT purged):

/dev/mapper/vgpool-lv_var  476G  276G  179G  61% /var


I ran the repo_sync by hand before leaving work for the evening in a screen session. Here is the time info. YMMV depends on bandwidth etc. etc.

repo_sync run ended

real    189m24.841s
user    7m26.358s
sys     7m15.786s

There were 22 deprecated pkgs that were not voices cached (mostly xprotect etc.) I did a 

repoutil --purge-product all-deprecated

Which removed those 22 updates. This left only the voices from 2013-07-24, 2012-05-13, and 2012-03-16 as deprecated items.


Filesystem                 Size  Used Avail Use% Mounted on
/dev/mapper/vgpool-lv_var  476G  274G  181G  61% /var

I added all the new voices in one shot with

repoutil --add-product all stable

Then got rid of the deprecated ones without having to remove them from the catalogs via

repoutil --purge-product all-deprecated --force

This finally brought the final disk usage to:


Filesystem                 Size  Used Avail Use% Mounted on
/dev/mapper/vgpool-lv_var  476G  222G  232G  49% /var


tl;dr You need a few hours and about 37GB to download all the new voices. But the new voices alone actually take up less space than the old ones did.