This first page will simply show you how to install OS X into a new VMware VM. If you have done this many times please take a quick skim through this page as we are going to make some modifications to ease the creation of our Vagrant box version catalog. I will mark these steps with a bold *.
Follow along with my graphical guide.
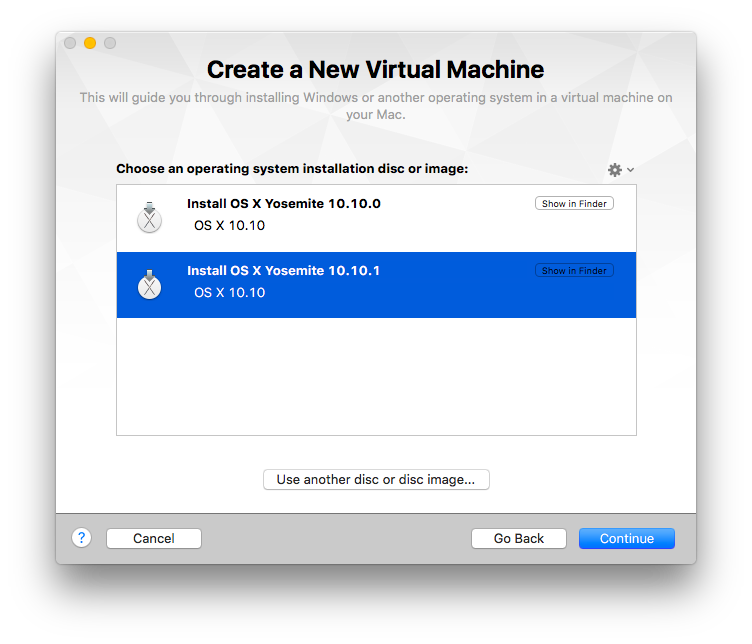
1. Create a New VM and select the OS X Installer app.


2. * At this point you will drag in (or select via dialog) an OS X installer app. This is the first step where the end goal matters. I want a catalog of OS X Versions available to me so I can spin up any point release at any time.
Why?
Because it is cool.
Also, for testing.
Because of this I have already copied all the installation app versions of Yosemite onto this computer (except 10.10.5 I already have a base box for that). We will start our journey with 10.10.0.


3. * Now we want to customize our VM. Click Customize Settings

4. * To do this Fusion requires that we save the configuration. The major os version is pre-populated as the VM name. We want to add (at the least) the minor version number to make this particular VM easier to find and keep track of later.


5. After a few moments at the following screen you will be presented with a window very similar to System Preferences.


6. * We are concerned with only a few settings here. These are highlighted below.
- We will change the networking on the VM from NAT to bridged.
- Adjusting the size of the drive is not required but if you plan to use the VM for testing large installations etc. you may want more than the default of 40GB.
- Removing the Sound Card, Camera, and USB controller is recommended by the documentation. I believe this is just to reduce Linux complexity and also reflects Vagrant's origins as a developer tool more than anything. The Sound Card and Camera can be removed but Fusion will tell you that OS X requires USB if you try to remove that functionality.

7. * In Network Adapter the circles on the right function as radio buttons and must be clicked to change this setting.


8. Changing the size of the virtual drive will require erasing or resizing the volume once the guest OS is running.


9. We can remove the sound card and the camera even though I don't think it is really necessary for an OS X box, the documentation suggests it.
*shrug*


10. Now that the hardware configuration is complete we can close the settings window and start up the VM.

11. The OS X installation environment is probably very familiar to anyone reading this. If you did change the size of the hard drive in the virtual machine now is a good time to fix the volume size. This can be done by erasing the volume or simply changing the size of the partition.
HINT: changing the size of the partition is MUCH faster.
- Select Disk Utility from the OS X Utilities window
- Highlight the VMware Virtual Machine Drive
- Select the Partition tab

- Now grab the lower right corner (red arrow) of the partition graphic and drag it down to expand the partition into the available free space.

- Click Partition on the warning sheet.

- Success!


13. * Once the installation is underway go back up to the top of this article and start again with the installer app for 10.10.1! I have found that two installations running simultaneously does not hinder things too much.


My next post will detail the changes required inside the guest OS in order for vagrant to do vagranty things. In the meantime create VMs for 10.10.2-10.10.5 if Yosemite is still important for you or create VMs for 10.11.0 and 10.11.1.
No comments:
Post a Comment